


Knowledge Base
Welcome to MS Connector Guide!
Key facts about MS Connector Activation
AI-powered Inbox is a Microsoft-validated connector from Go Autonomous, a Microsoft Partner.
The main purpose of this connector is to source emails in the backend mode, which means it won’t disrupt end-user workflows, enabling you to demonstrate the capabilities of the Go Autonomous platform on your data.
Microsoft authentication requires an IT representative with Azure Active Directory admin rights to enable the connector.
It usually takes only three minutes to complete the connector activation. Afterward, it may take up to ten minutes after permission is granted for the connector to appear on the Go Autonomous platform.
Once the connector is available on the platform, you can complete the setup without IT involvement. You can select the inboxes to share the emails directly on the Go Autonomous platform.
If you have any questions or need assistance, do not hesitate to contact your Success Manager anytime.
Part A. Setting up Security Groups
Requires MS Azure AD admin rights
Ensure data security
The organization may restrict access to your data even before activating the Go Autonomous MS connector.
- Here is the official MS guide on how to limit application permissions to specific exchange online mailboxes.
- Here is the link for admin to set up security groups.
- Application IDs to Go Autonomous environments:
- Production: 9bf31adb-e585-43db-9a11-829ec8d6fd89
- QA: 2a767483-2f85-41ad-b898-5e696909cea0
- Sandbox: 3572cb4b-6ffc-43bf-a8d5-76b1ab665391
Part B. Enable MS Outlook connector
Requires MS Azure AD admin rights. Requires Go Autonomous Admin rights.
It takes 15 sec to complete all the steps. Watch the video!
1. Login to Go Autonomous
- Navigate to my.goautonomous.io – the portal to manage all things Go Autonomous for your organization.
- Please enter the credentials provided by Go Autonomous success manager.
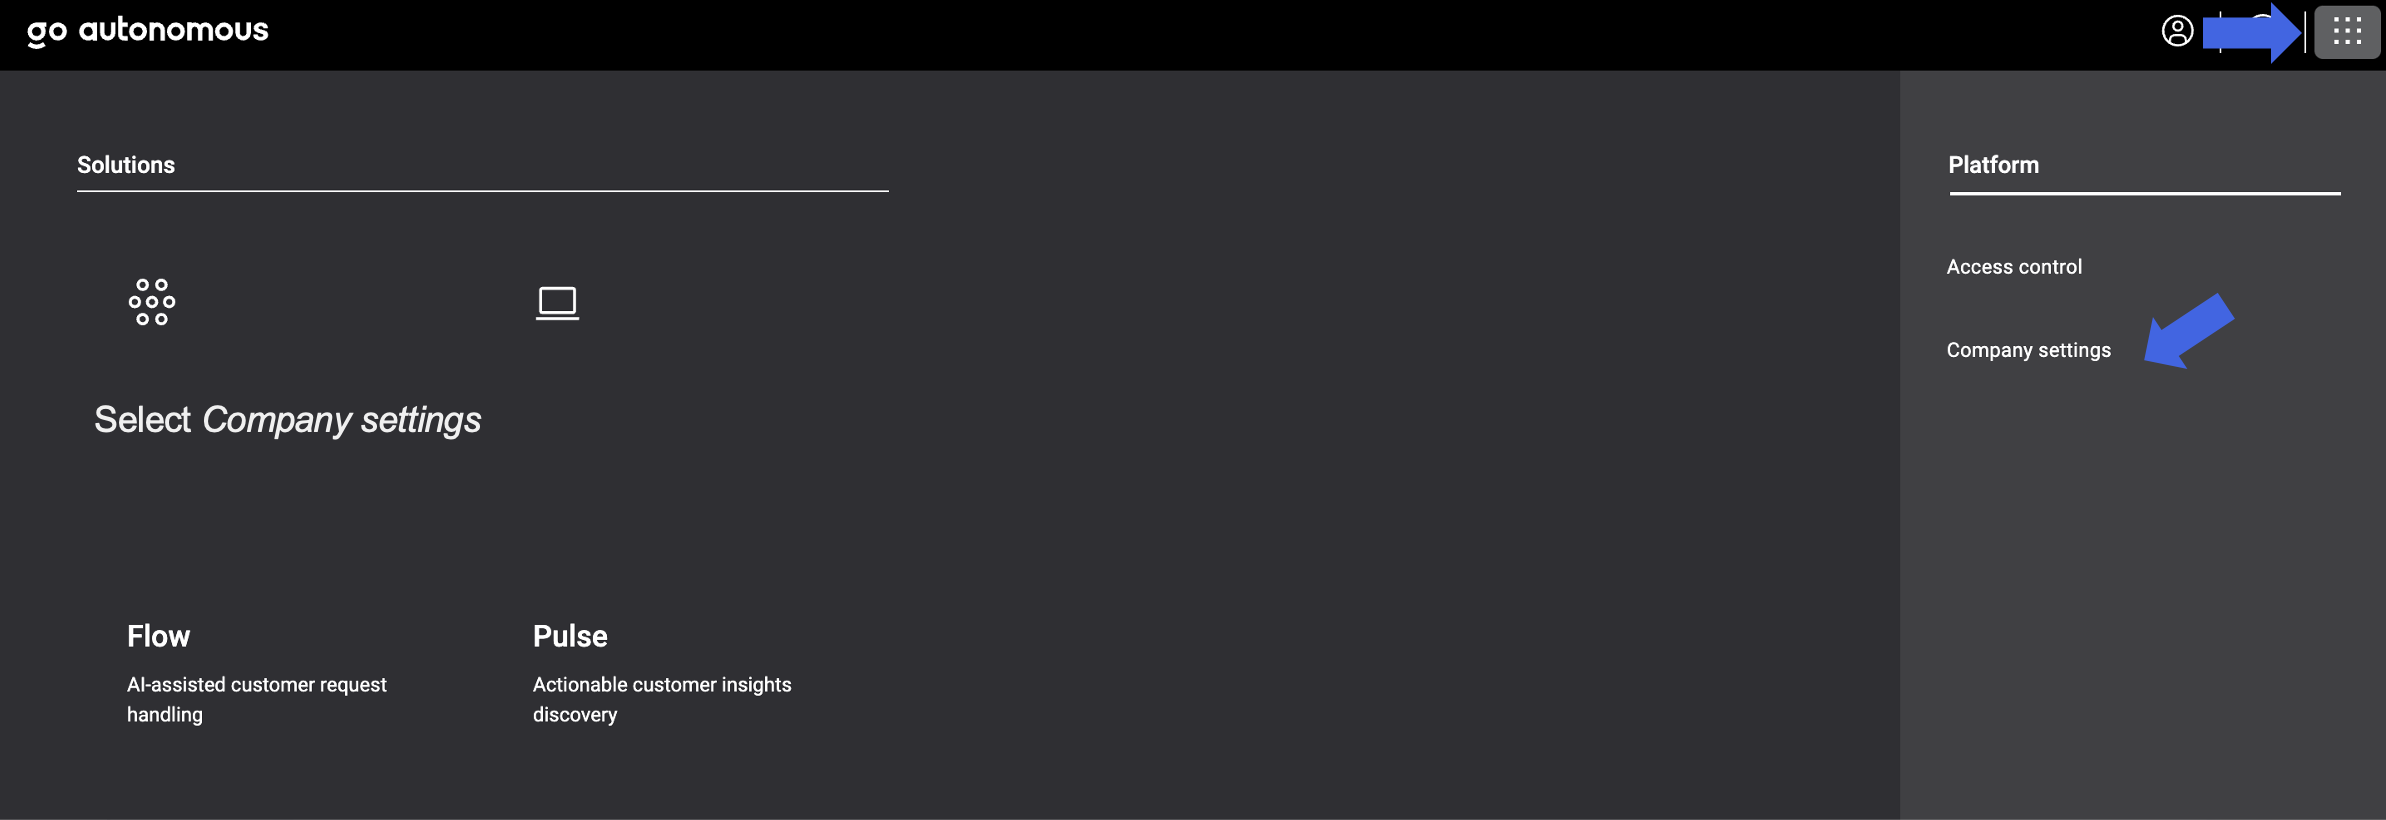
2. Navigate to company settings
Click on the Menu button in the upper right corner of the screen.
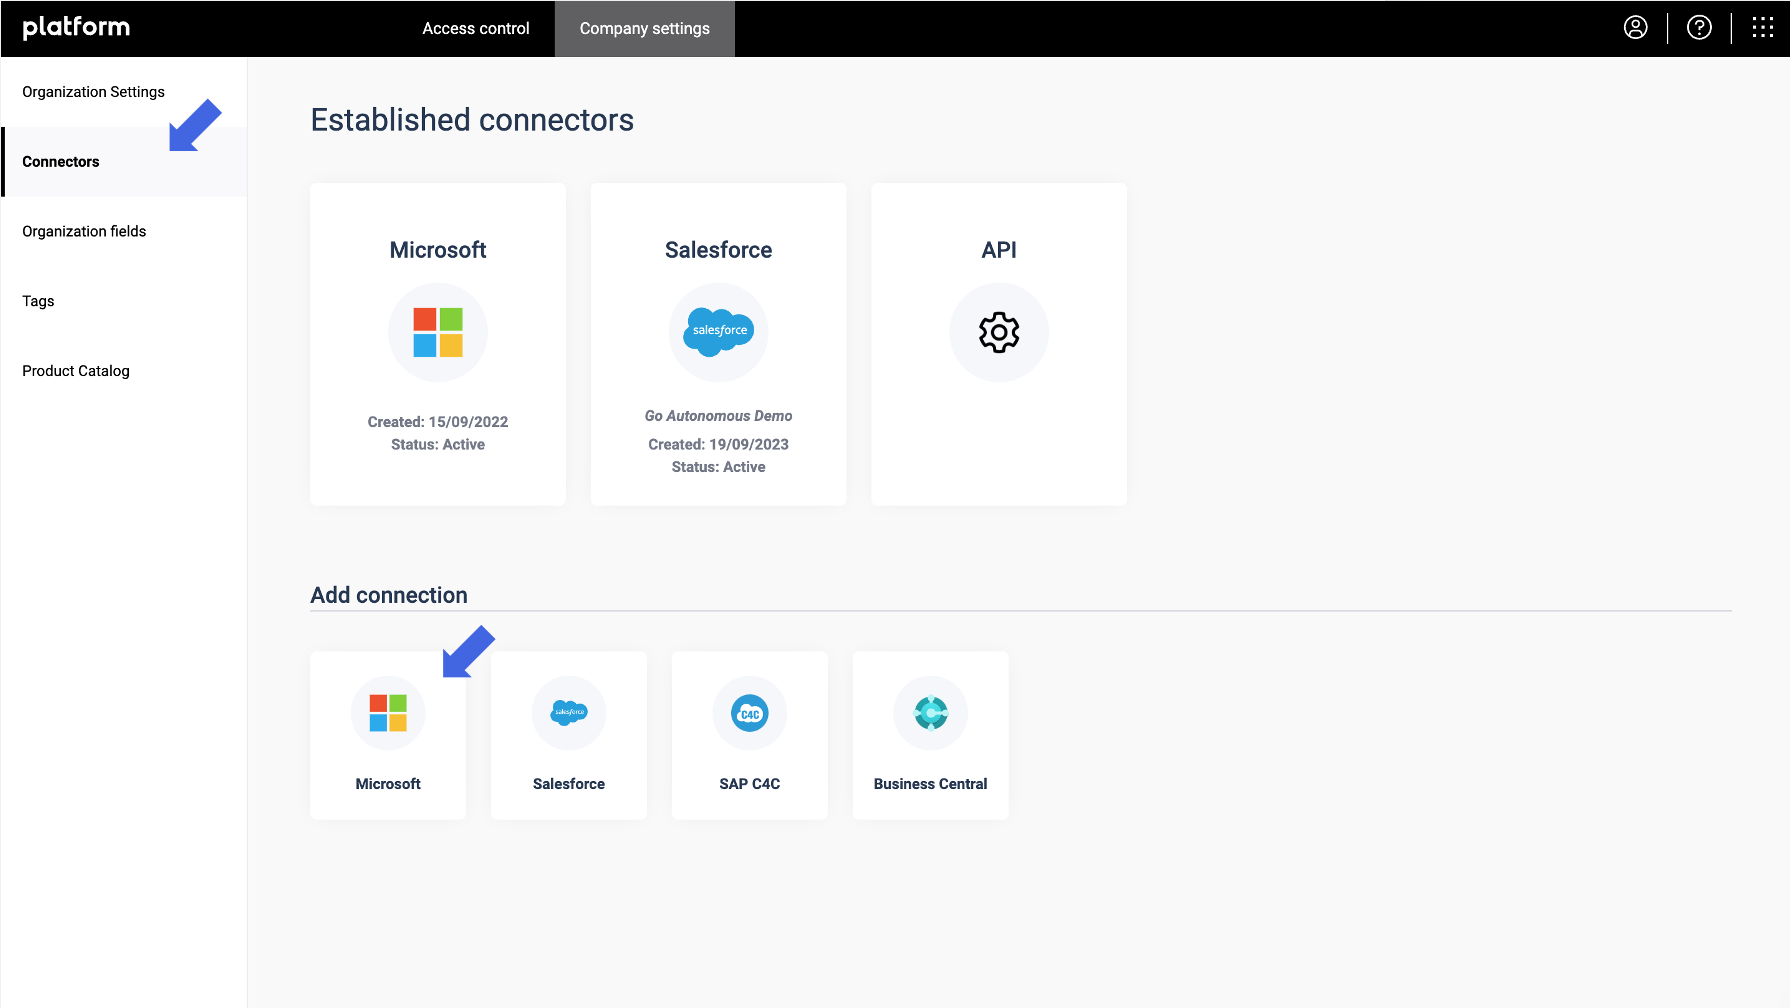
3. Add Microsoft connector
Navigate to Connectors part of the settings
Click on the Microsoft connector in the Add connection section.
4. Login with MS admin credentials
4. Login with MS admin credentials
Standard Microsoft authentication prompt hosted by Microsoft should appear. Microsoft conducts processing of your Microsoft credentials and is not visible to Go Autonomous.
Please enter your Microsoft credentials.
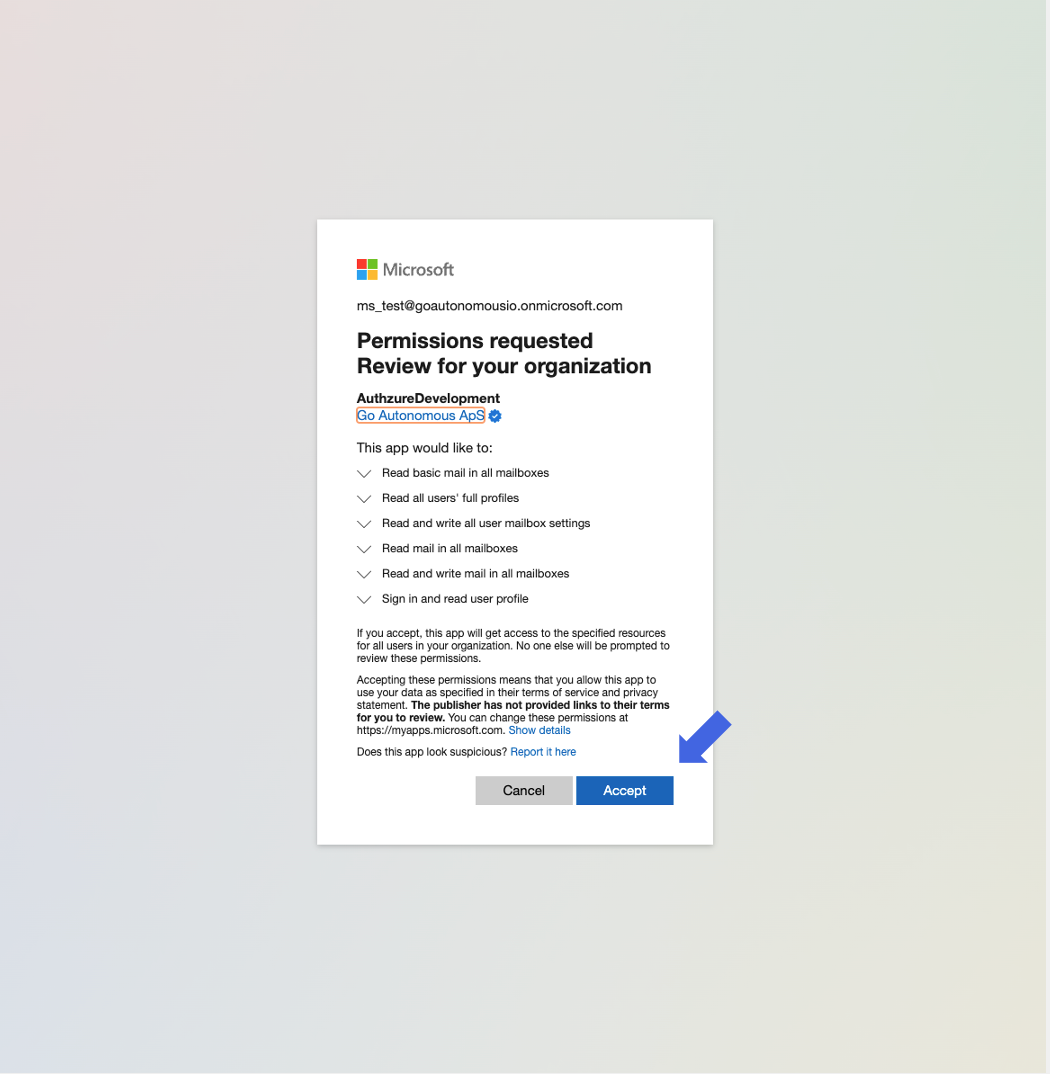
5. Accept permissions
Click Accept to authorize the plug-in activation
All done here!
Moving on to the last step.
Success!

6. Make sure the connector is activated
Click on the established connector.
It can take up to 10 minutes after the previous step for it to appear.

Part C. Setup inbox sourcing
Requires MS Outlook connector activated. Requires Go Autonomous Admin rights.
1. Open the established connector
You can continue in the same login session as in Part B (note: provided credentials also could be used)
Navigate back to Platform > Company settings > Connectors.
Click on the established connector
It can take up to 10 minutes after the previous step for it to appear.
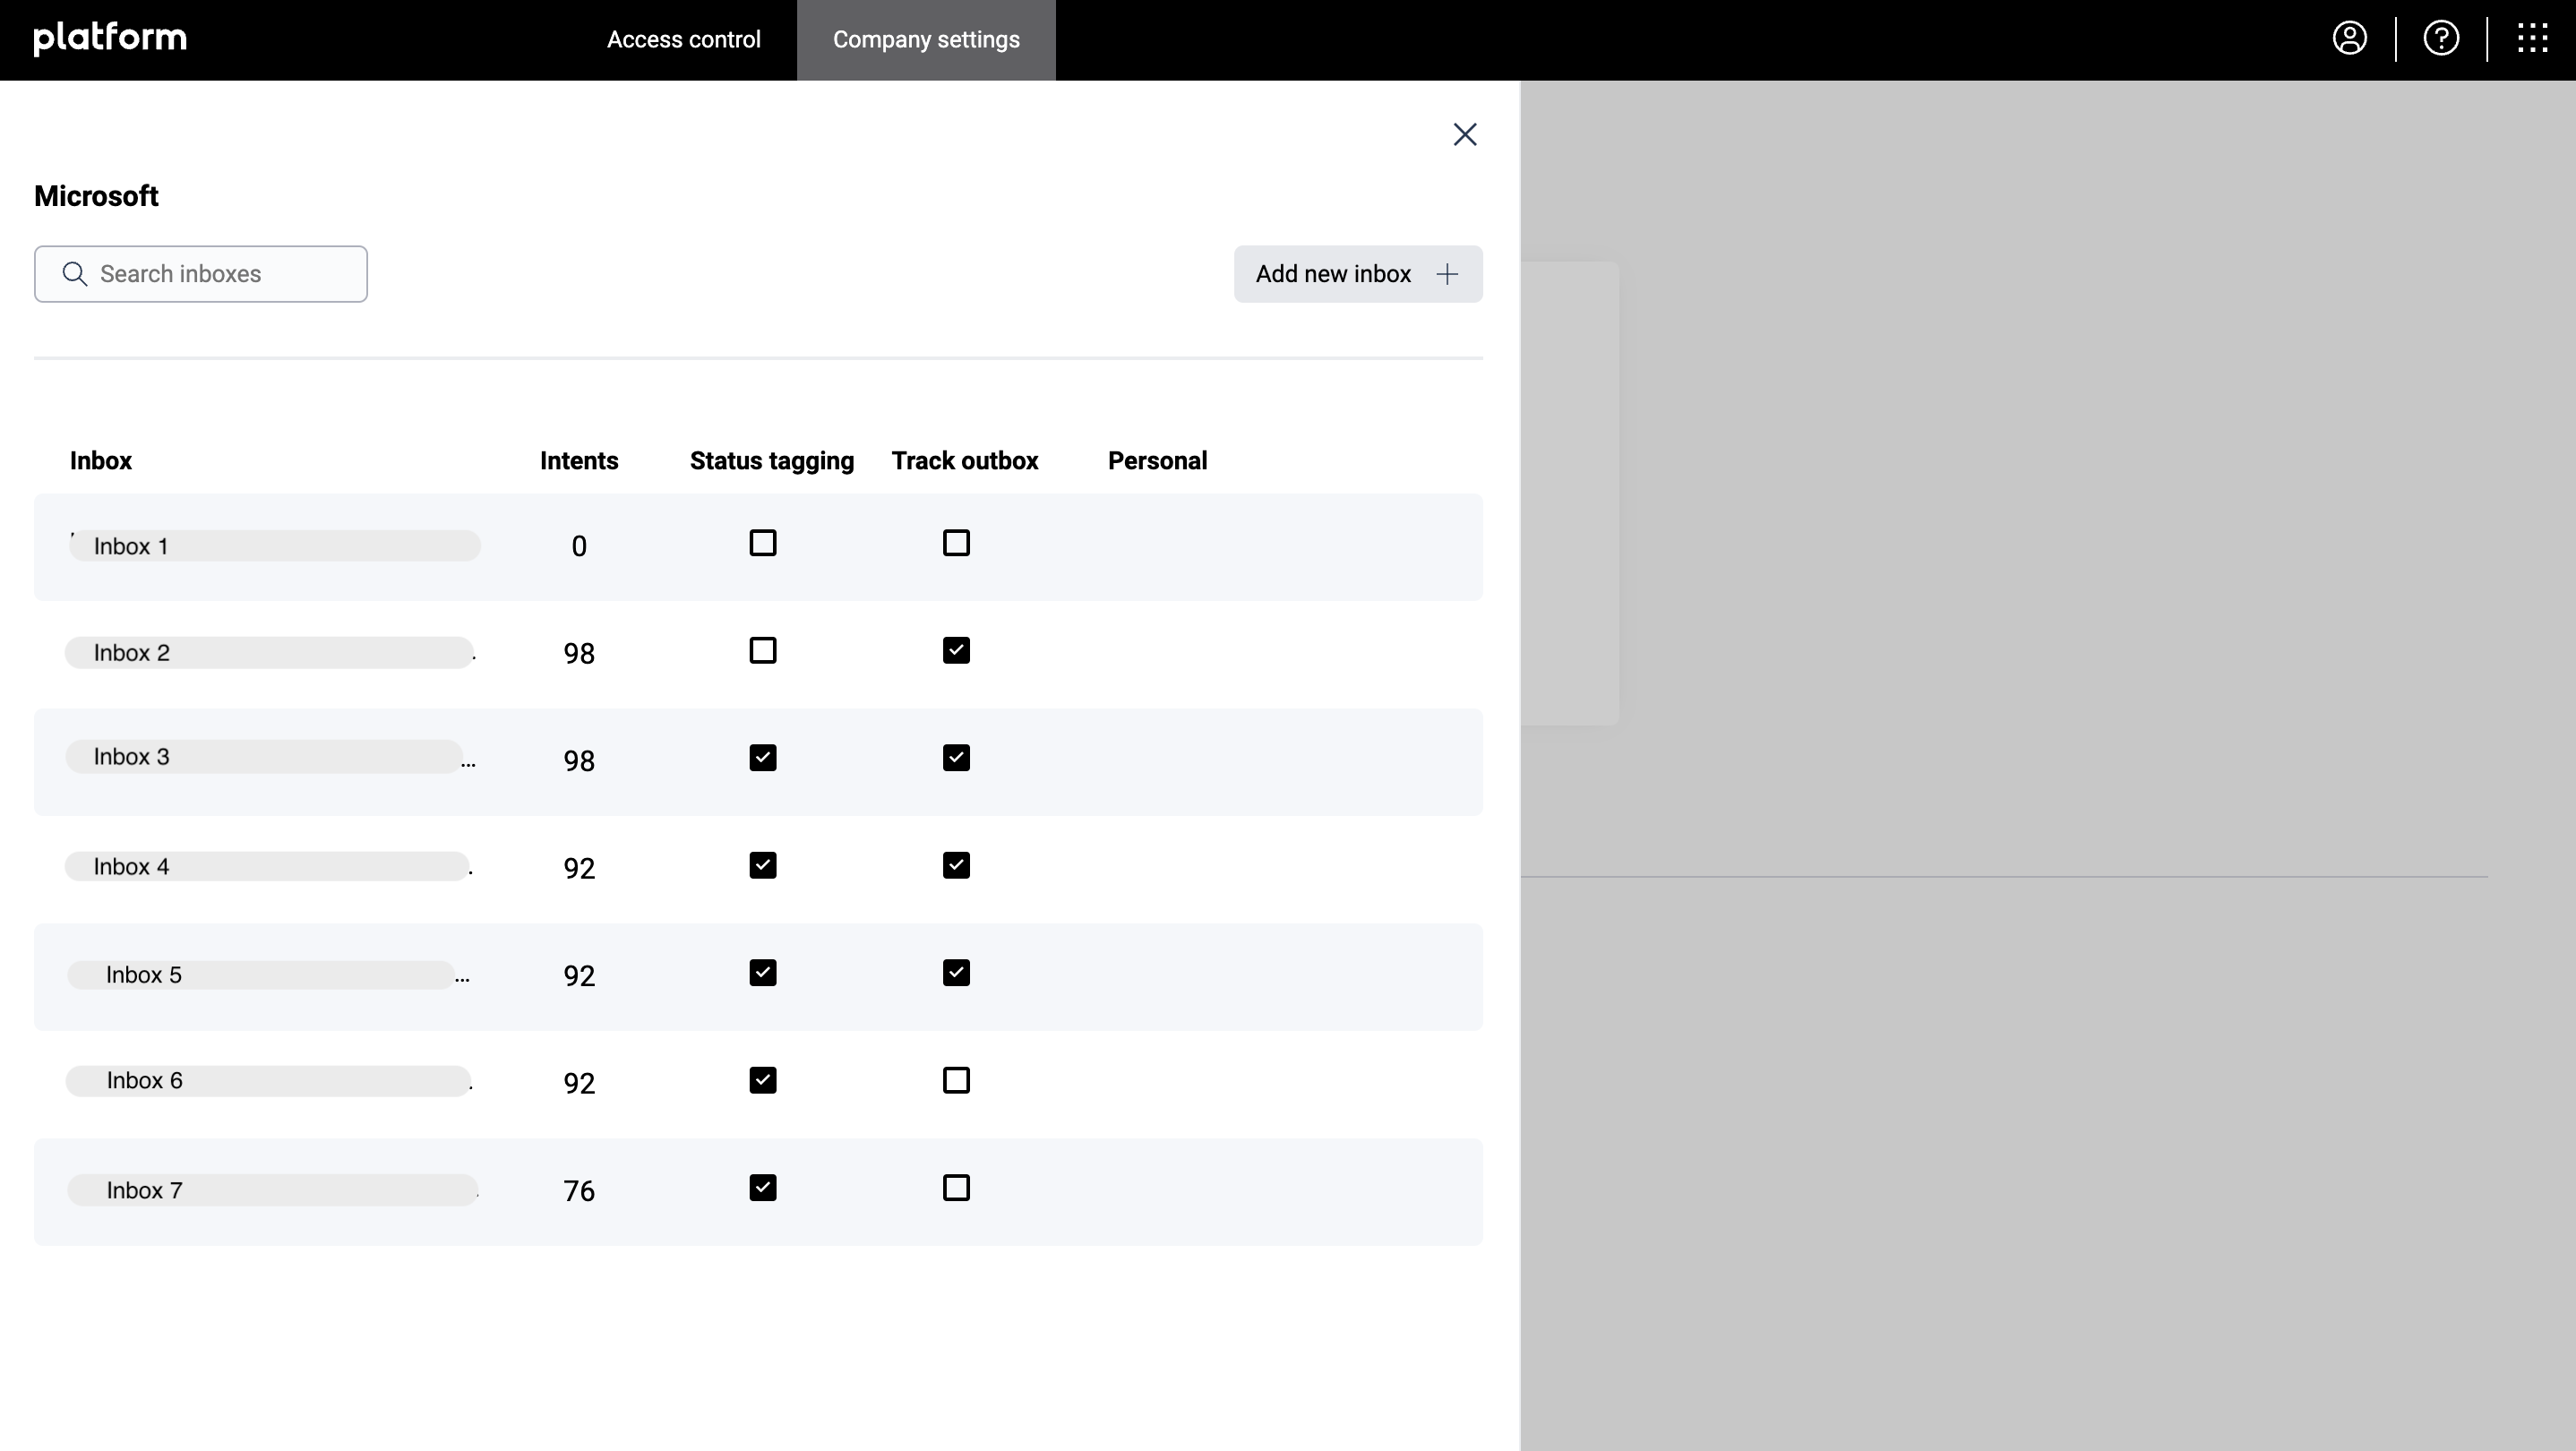
2. Add inboxes
Select the inboxes that you would like to source emails for the trial assessment
Note: only the new incoming emails will be sourced, not the ones already present in the inbox.

Success!
The selected inboxes should appear on the left-hand side of the screen.
Troubleshooting
A. “I do not see the desired inboxes available for connection described step C”.
Please check whether the following requirements are satisfied:
- The inbox is a part of a security group created in part B.
- Inbox is spelled exactly as in Azure Active Directory (exact upper and lower case spelling for each letter of the inbox).
- If the inbox has aliases, try searching for them considering the above.
B. I have connected the inbox, but I do not see emails coming in Go Autonomous environment.
Please check whether the emails are not automatically moved by Outlook to subfolder of the inbox.